Over time the 15 GB free storage of Google Drive gets full and then Google recommends you to upgrade to a paid plan for more storage. Having no or little space on Google Drive means that Google Services (Gmail, Photos, and Google Drive) might not work smoothly or might not work at all. Thus If you want to keep using Google Drive for free, you need to manage the 15 GB free space of Google Drive smartly. One way of doing this is to delete unwanted data from Google Drive, which in this article I will show you how to do, using both a PC and a Smart Phone.
Using a PC
Step 1: From your PC sign in to your Gmail account and then click on the Gmail app launcher towards the upper right of the screen. Step 2: Find the “Google One” app, and run it by clicking on it. Step 3: Inside “Google One” click on the “Storage” button in the vertical tab to the left of the screen.
Step 4: “Google One” will show you the extent to which your Google Drive is full and will also display an app-wise breakup of storage space being used. Step 5: In my case, the Photos app is filling up my Google Drive space. So I’ll be cleaning it up. Note: In your case, it could also be Gmail or Google Drive if you have been using them to save large files.
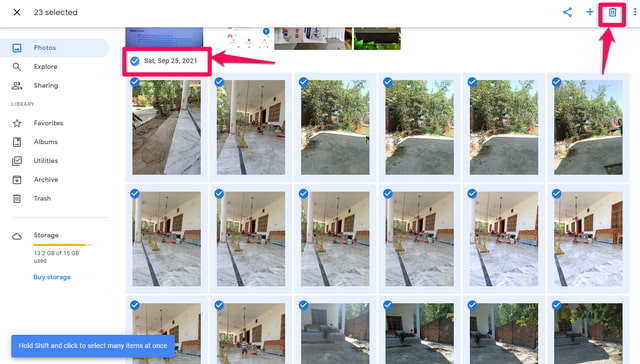
Step 6: To free up space from the Photos app click on the small blue arrow in front of it to launch the Photos app to explore its data. Step 7: In the Photos app you can either select all the files in a particular category by clicking on the small blue tick button on the top of each category or select multiple files by clicking on them individually.
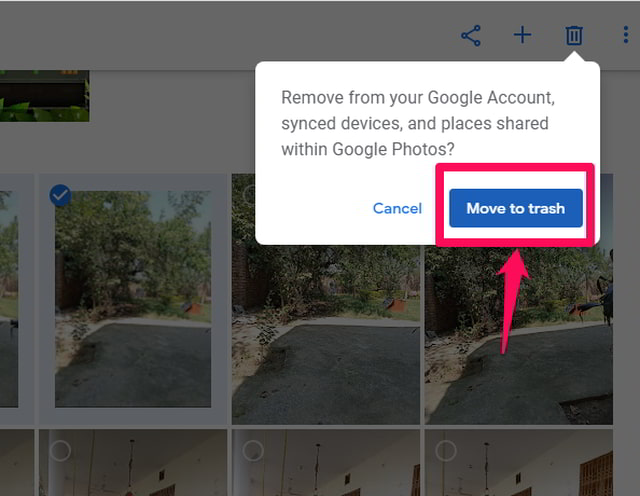
Step 8: After selection click on the trash button in the top right of the screen to move the selected files to trash and tap on the “Allow” button to confirm.
Step 9: Now you can either wait for Google to delete the item in the trash automatically after 30 days or proceed to the trash folder and delete them permanently and reclaim storage space immediately. Step 10: To visit the trash folder click on the “Trash” button in the pane towards the left. Step 11: Inside the trash folder, click on the “Empty Trash” button in the upper right of the screen or select the files individually by clicking on them and then clicking on the “Delete Permanently” button in the upper right of the screen.
Step 12: At the end, you will see a confirmation message that the data has been permanently deleted.
Using a Smartphone
Deleting unwanted data from Google Drive using a smartphone is very similar to that of the PC method. For demonstration, I’ll be using an Android phone. Step 1: From your phone run the “Google One” app by tapping on it. On iPhone, you can download Google One if you don’t already have it. Step 2: Tap on the “Get Started” button if you are using it for the first time. Step 3: On this screen, you will immediately notice the extent to which your Google Drive is full. Step 4: Tap on the “Storage” tab towards the bottom of the screen to see an app-wise summary of your Google Drive storage space usage.
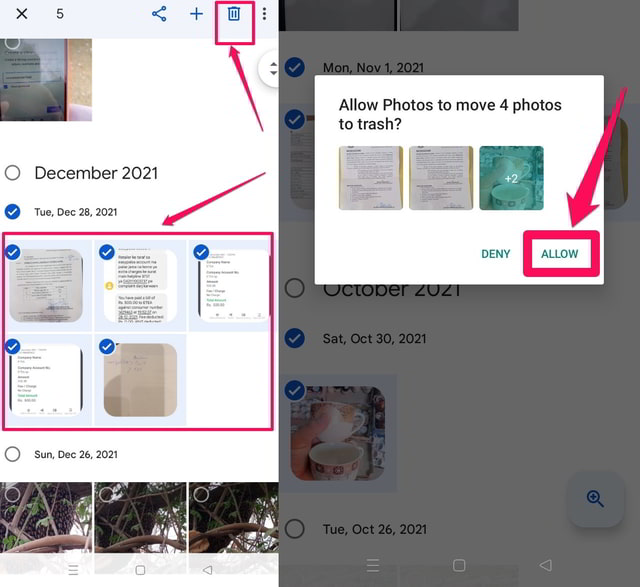
Step 5: To free up space from the Photos app tap on the small blue arrow in front of it. Step 6: Just like the PC method, select unwanted photos and videos by tapping on them and then move them to trash by clicking on the trash button in the top right of the screen. Step 7: Next tap on the “Allow” button to confirm. A message will be displayed on the screen that the files have been moved to trash.
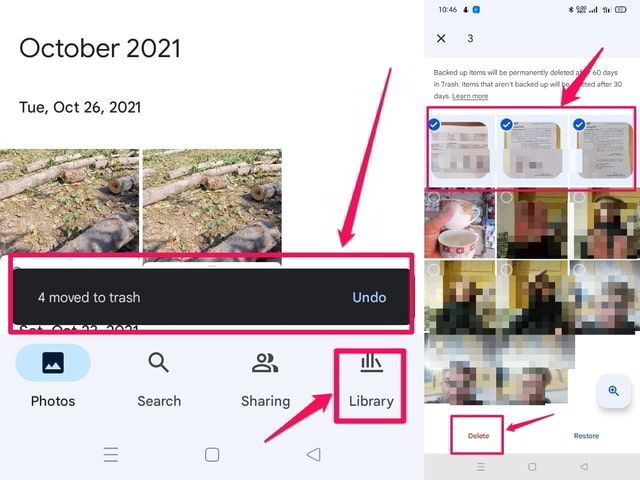
Step 8: Now you can either wait for Google to delete the item in the trash automatically or you can delete them and reclaim storage space immediately from the trash folder. Step 9: To visit the trash folder tap on the “Library” tab in the bottom right of the screen and then tap on the “Trash” button in the top right of the screen. Step 10: Select the files you want to delete permanently by tapping on them and then tap on the “Delete” button in the lower-left of the screen. You will be shown a confirmation message that the data has been permanently deleted.
Tip: If you don’t want to delete the data and don’t want to buy more space either, then you can also create a new Google account separate from your current account and move the data there. Here’s a guide on how to move data between 2 Google photos accounts.
Conclusion
In this article, I have discussed reclaiming storage space in Google Drive by deleting unwanted data from the “Photos” app with the help of the “Google One” app using both a PC and a smartphone. Sorting data according to size in the Photos app would have been very helpful to delete large files to empty up storage space quickly. But unfortunately, this feature is not available in the Photos app. If your Google Drive storage is mostly taken by Gmail or by other large files stored on Google Drive, then you will have to free up space by deleting unwanted data from those apps accordingly.